|


Last updated
11/08/06
| |
Web Panache Dial-Up Settings for Windows 98
- Double-click the "My Computer" icon
on your Windows 98 desk-top. The "My Computer" window opens.
- Double-click
the "Dial-up Networking" icon. The "Dial-up
Networking" window opens.
- Double-click the "Make New
Connection" icon. The "Make New Connection" window
appears. Example:
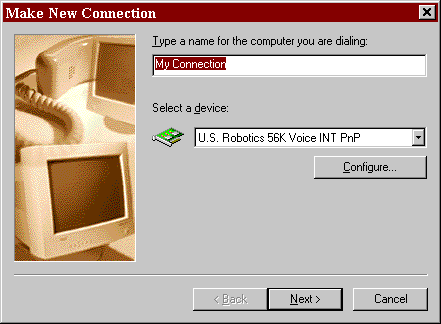
- Notice that the default value for "Type
a name for the computer you are dialing" field is "My
Connection". You must replace this value with a name meaningful to
you. We recommend the algorithm of "Web Panache - Your City"
(e.g. Web Panache - Denver). If you plan on adding more than one
number for the same city, you may want to differentiate them (i.e. Web
Panache - Denver1 and later, Web Panache - Denver2, etc.)
- In the "Select a device"
field, select the type of modem (or other device) you have installed on your
computer through which you access the internet.
- Click the "Next" button. The
following window appears:

- In the "Area Code and Telephone Number"
fields, enter the Web Panache access number for your area (note: the number
in this example is not a valid number. Please refer to our master list
for the access numbers in your city or state.)
- In the "Country or region code"
field, select the country or region you are dialing in from. Click
"Next".
- The next window to appear should be a success
message similar to the following:
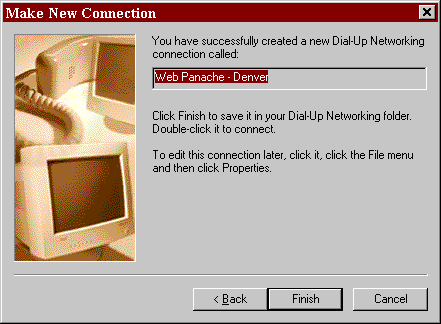
-
Click "Finish"
to save your work.
Upon completion, your Dial-Up Networking window
should contain a new icon for the connection you just created.
To add another connection using a different
access number, simply repeat this process, using a different name and access
number. That's all there is to it!
| |
|